learning AWS Elastic Block Store (EBS), snapshot, Intance Store, EFS, AMI
EBS (Elastic Block Store)
- An EBS Volume is a network drive you can attach to your instances while they run.
- It allows your instances to persist data, even after their termination
- They are bound to a specific availability zone
Snapshot
- make a backup (snapshot) of your EBS volume at a point in time
- not necessary to detach volume to do snapshot, but recommended
- can copy snapshots across AZ or region
- Snapshot Archive
- move a snapshot to an ‘archive tier’ that is 75% cheaper
- takes within 24 to 72 hours for restoring the archive
- Recycle Bin for Snapshots
- Setup rules to retain deleted snapshots so you can recover them after an accidental deletion
- Specify retention (from 1 day to 1 year)
EC2 Instance Store
- EBS volumes are network drives with good but “limited” performance
- if you need a high-performance hardware disk, use EC2 Instance Store
- Better I/O performance
- EC2 Instance Store lose their storage if they’re stopped
- good for buffer / cache / scratch data / temporary content
- risk of data loss if hardware fails
- backup and replication are your responsibility
EFS (Elastic File System)
- EFS works with Linux EC2 instances in multi-AZ
- managed NFS (network file system) that can be mounted on 100s of EC2
- Highly available, scalable, expensive (3x gp2), pay per use, no capacity planning
EFS Infrequent Access (EFS-IA)
- storage class that is cost-optimized for files not accessed every day
- up to 92% lower cost compared to EFS standard
- EFS will automatically move your files to EFS-IA based on the last time they were accessed
- Enable EFS-IA with a Lifecycle Policy
- Example: move files that are not accessed for 60 days to EFS-IA
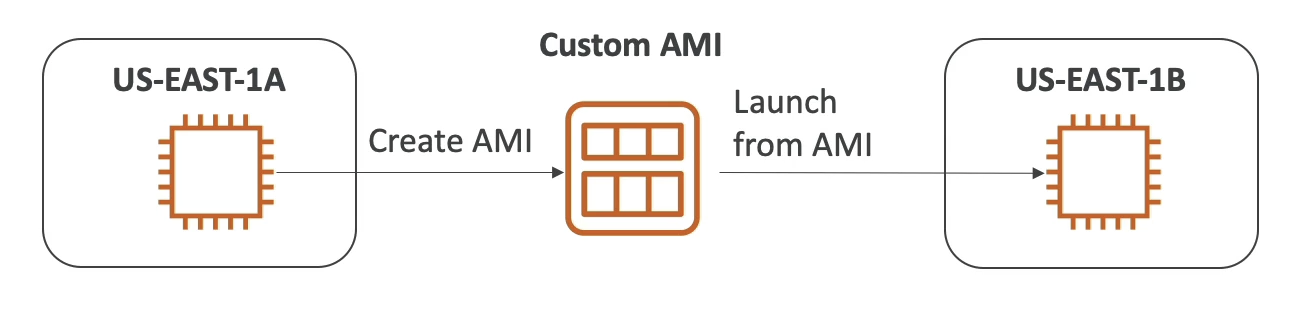
AMI
Overview
- AMI = Amazon Machine Image
- AMI are a customization of an EC2 instance
- you add your own software, configuration, operating system, monitoring
- faster boot / configuration time because all your software is pre-package
- AMI are built for a specific region (and can be copied across regions)
- You can launch EC2 instances from:
- A Public AMI: AWS provided
- your own AMI: you make and maintain them yourself
- An AWS Marketplace AMI: an AMI someone else made (and potentially sells)
Process
- start an EC2 instance and customize it
- stop the instance (for data integrity)
- build an AMI – this will also create EBS snapshots
- launch instances from other AMIs
Hands on
Create EBS Volume
- create new instance (see tutorial in the aws-ec2)
- check the EBS by clicking the new instance > “Storage” tab > “Block devices”
- to add new volume to the instance, create new one and config the “Volume settings” as figure below
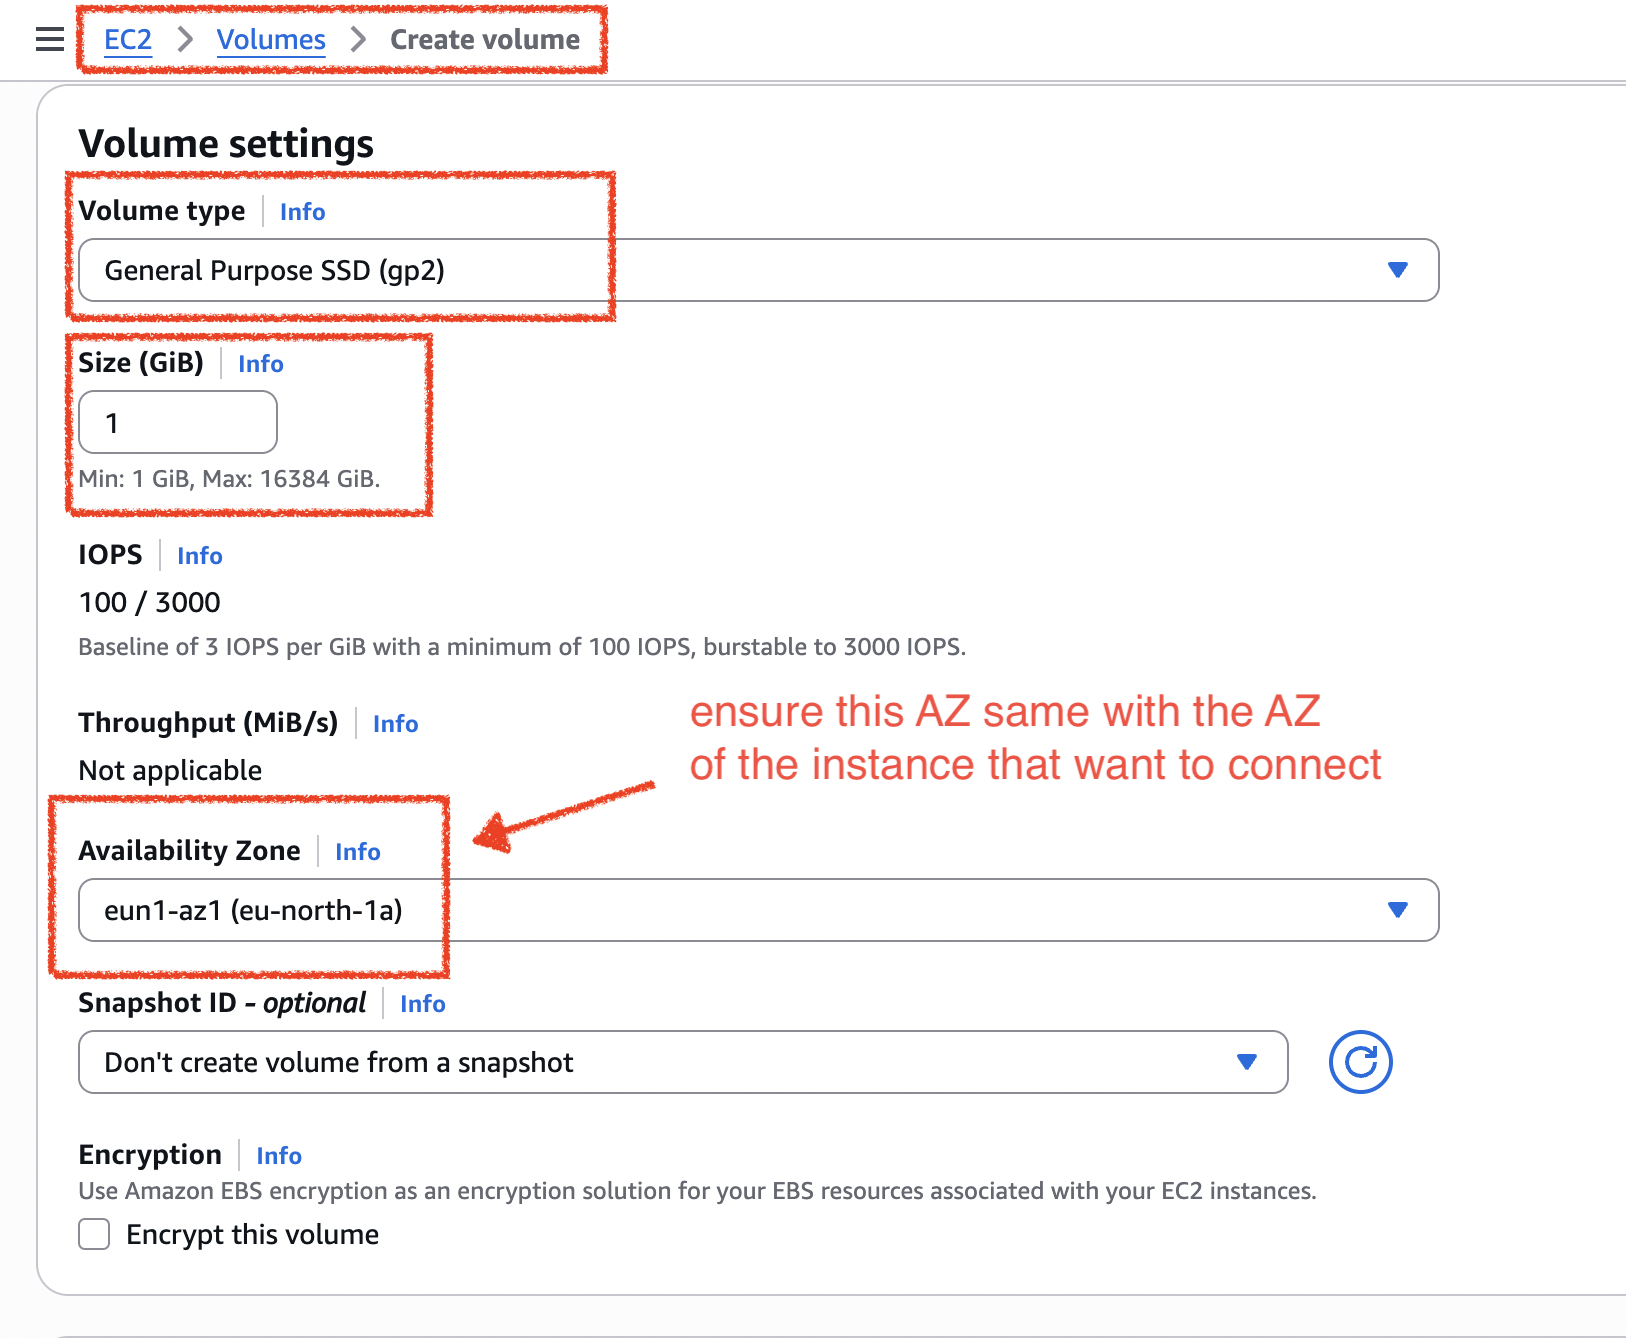
- to see the AZ of the instance, click the instance > “Networking” tab > see “Availability zone”
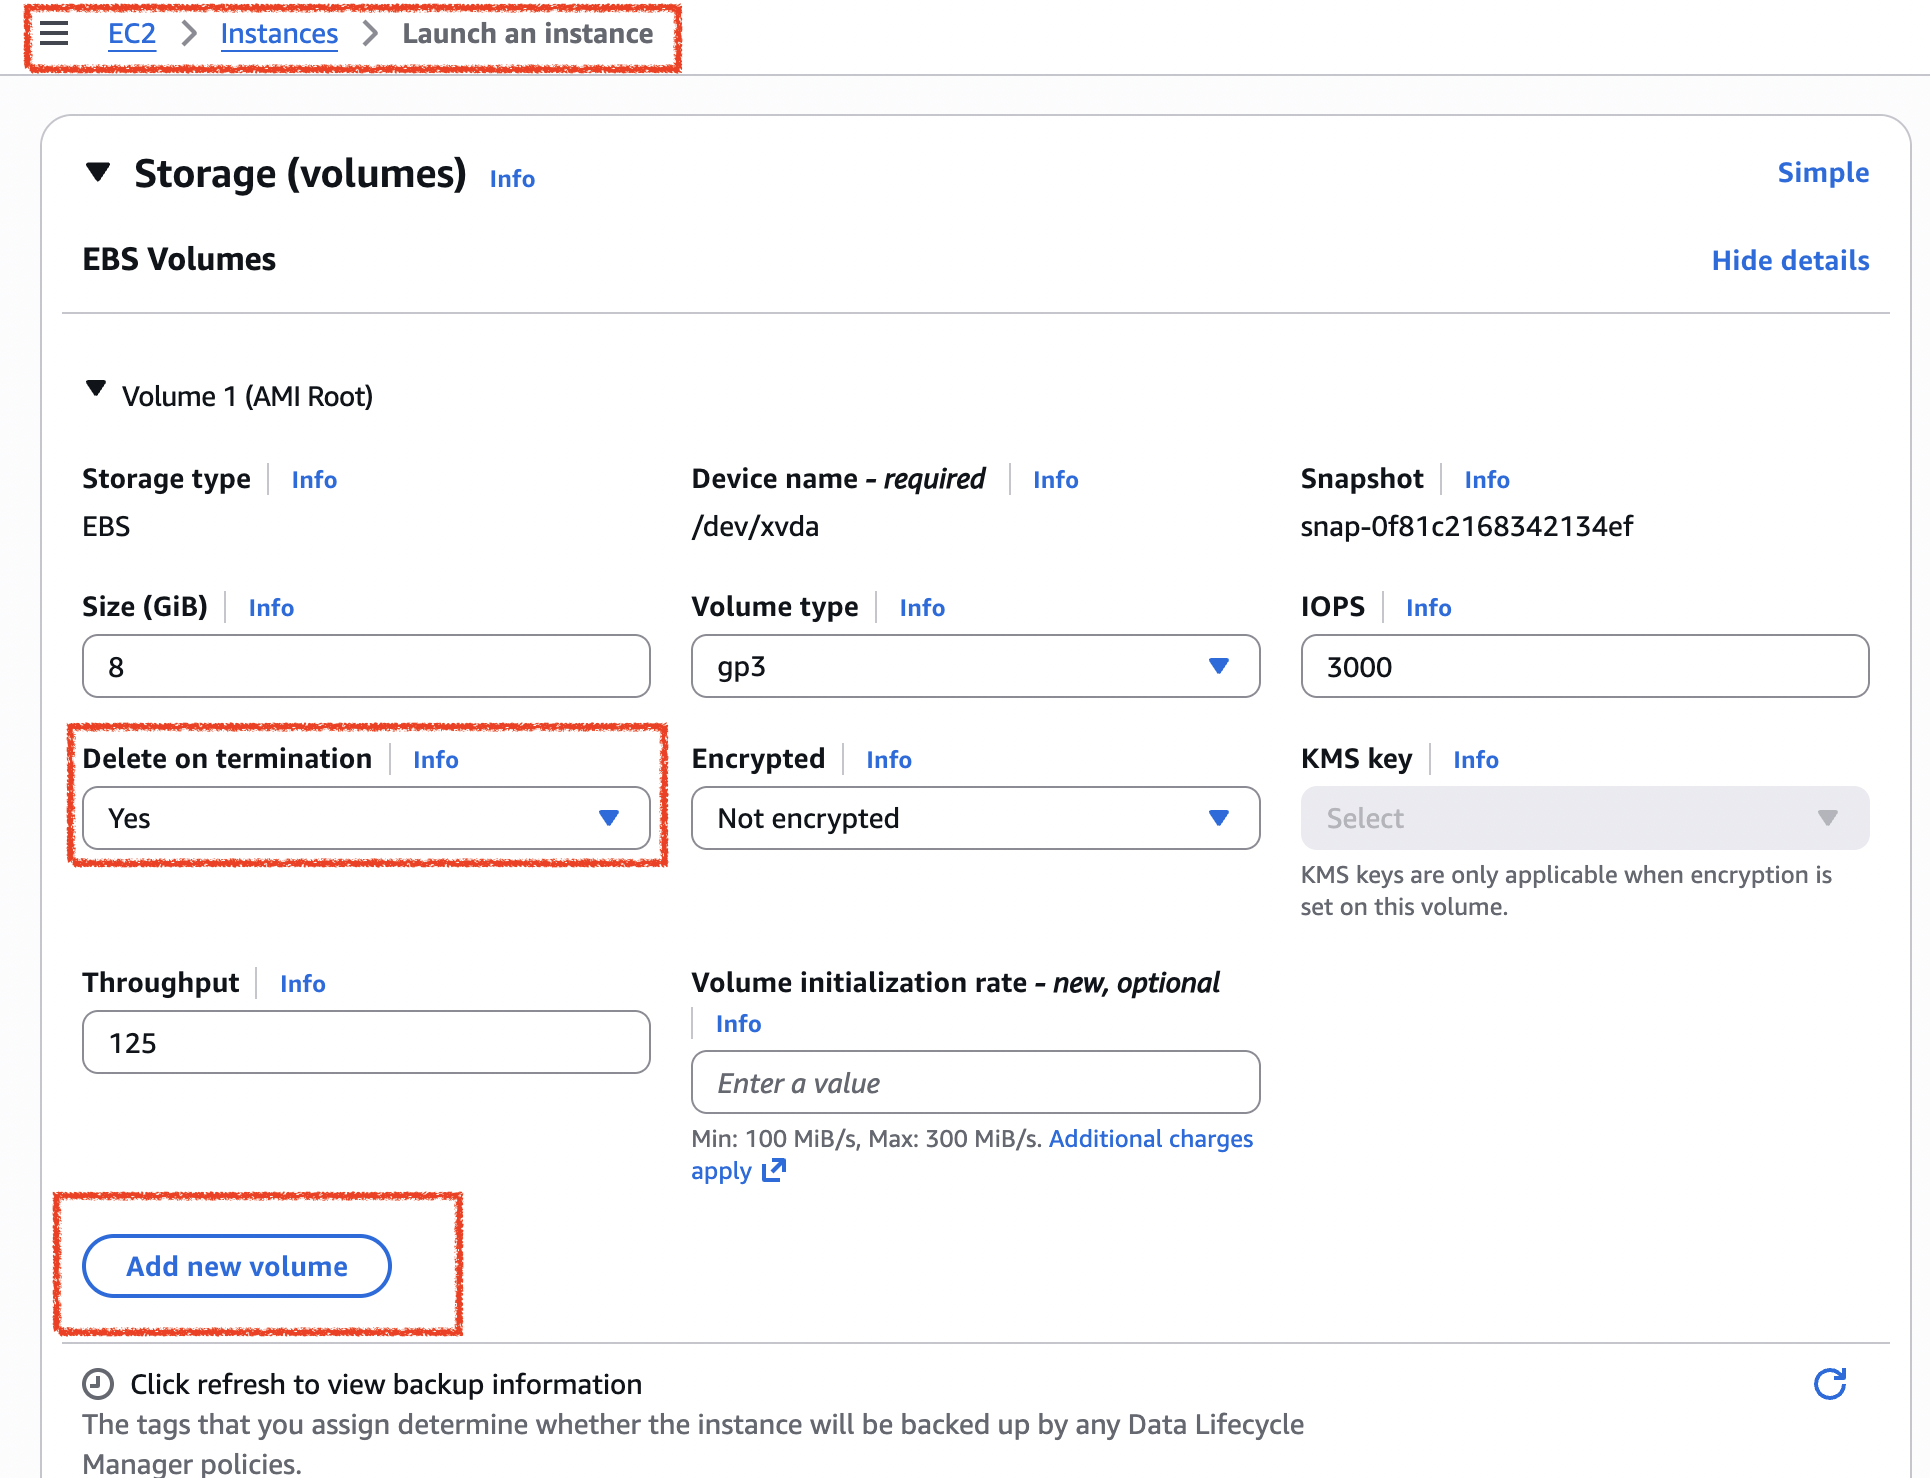
- you can also config the volume during the creation of new instance like the figure below
Snapshot
Volume to Snapshot
- pick a volume you want to create snapshot, click “Actions” and choose “Create snapshot”
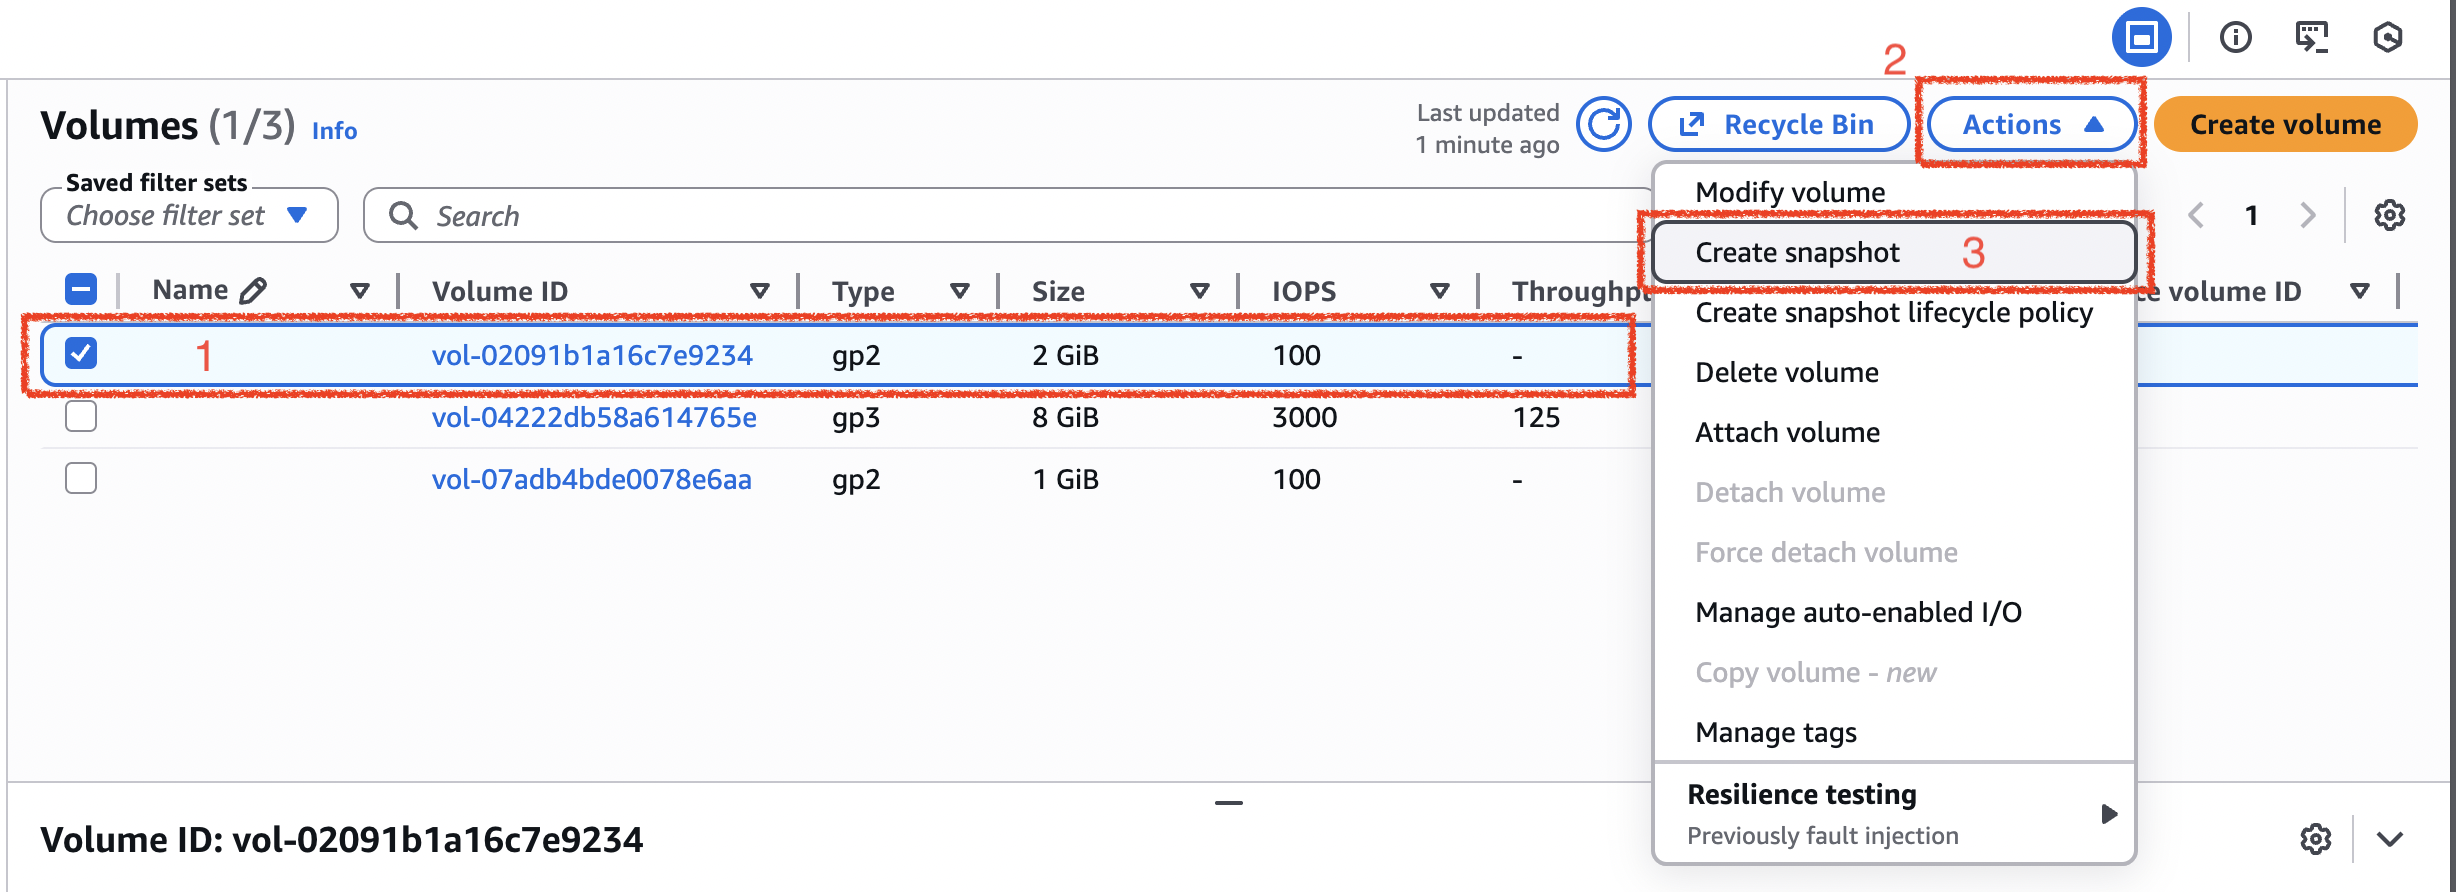
- then you can give description in the snapshot details and add some tags. after finish, click “Create snapshot”
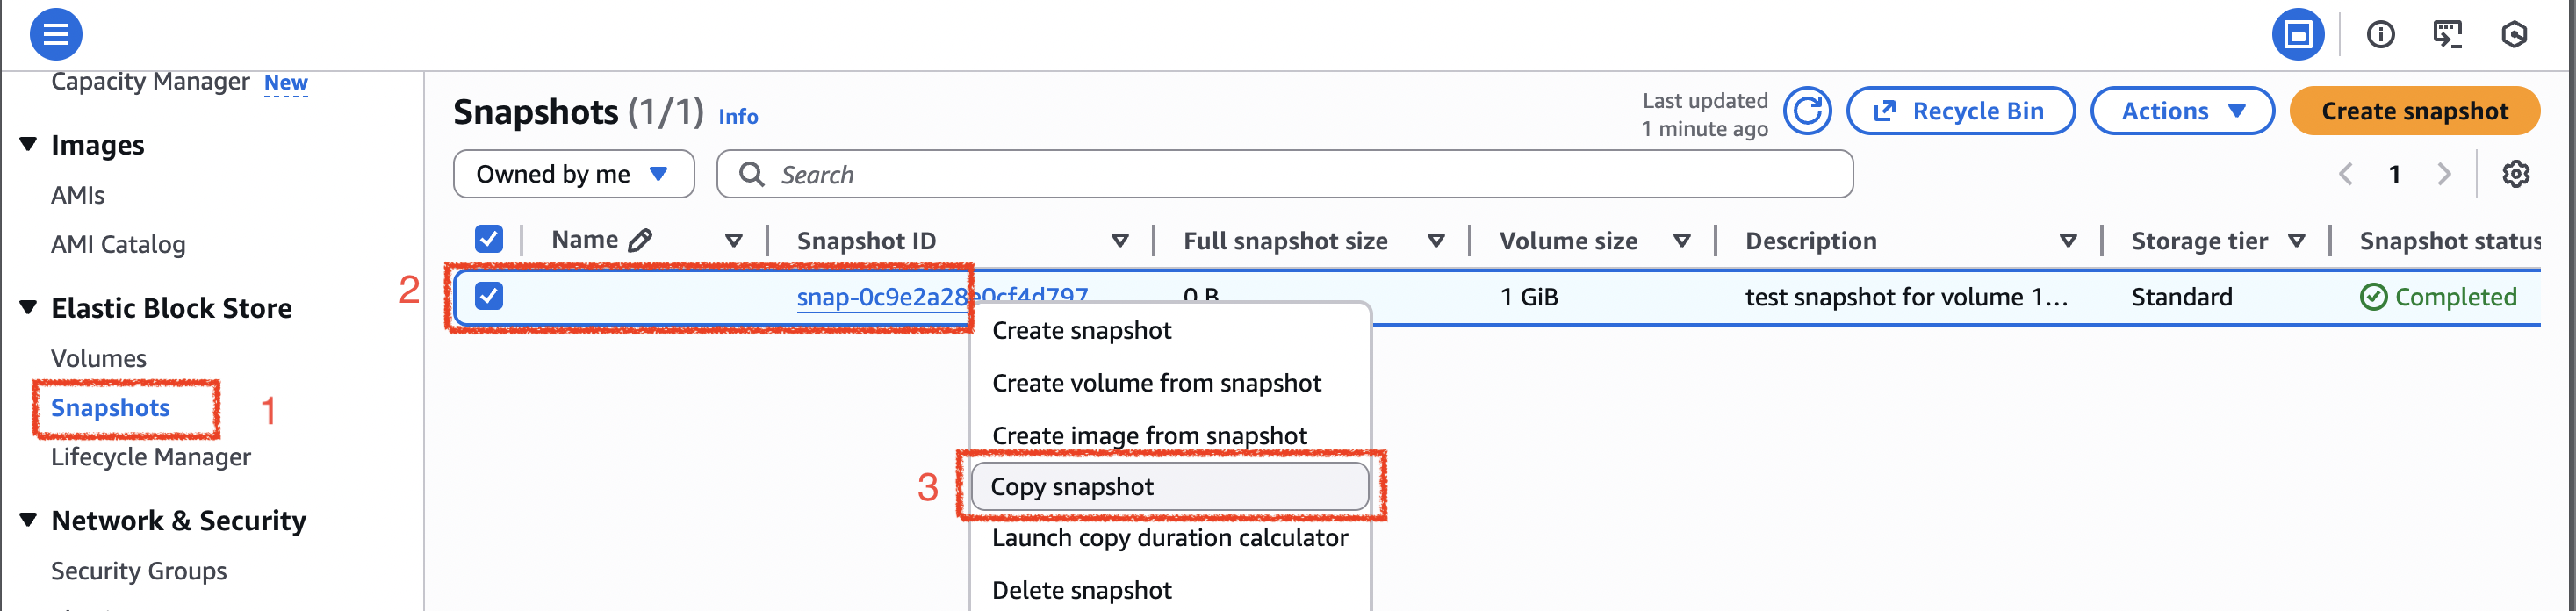
Copy snapshot
- in the “Snapshots” menu, right click a snapshot and click “Copy snapshot”
- in the “Snapshot copy details”, you can pick “Destination Region” is the region in which to create the snapshot copy.
- then click “Copy snapshot” button on the right bottom conner.
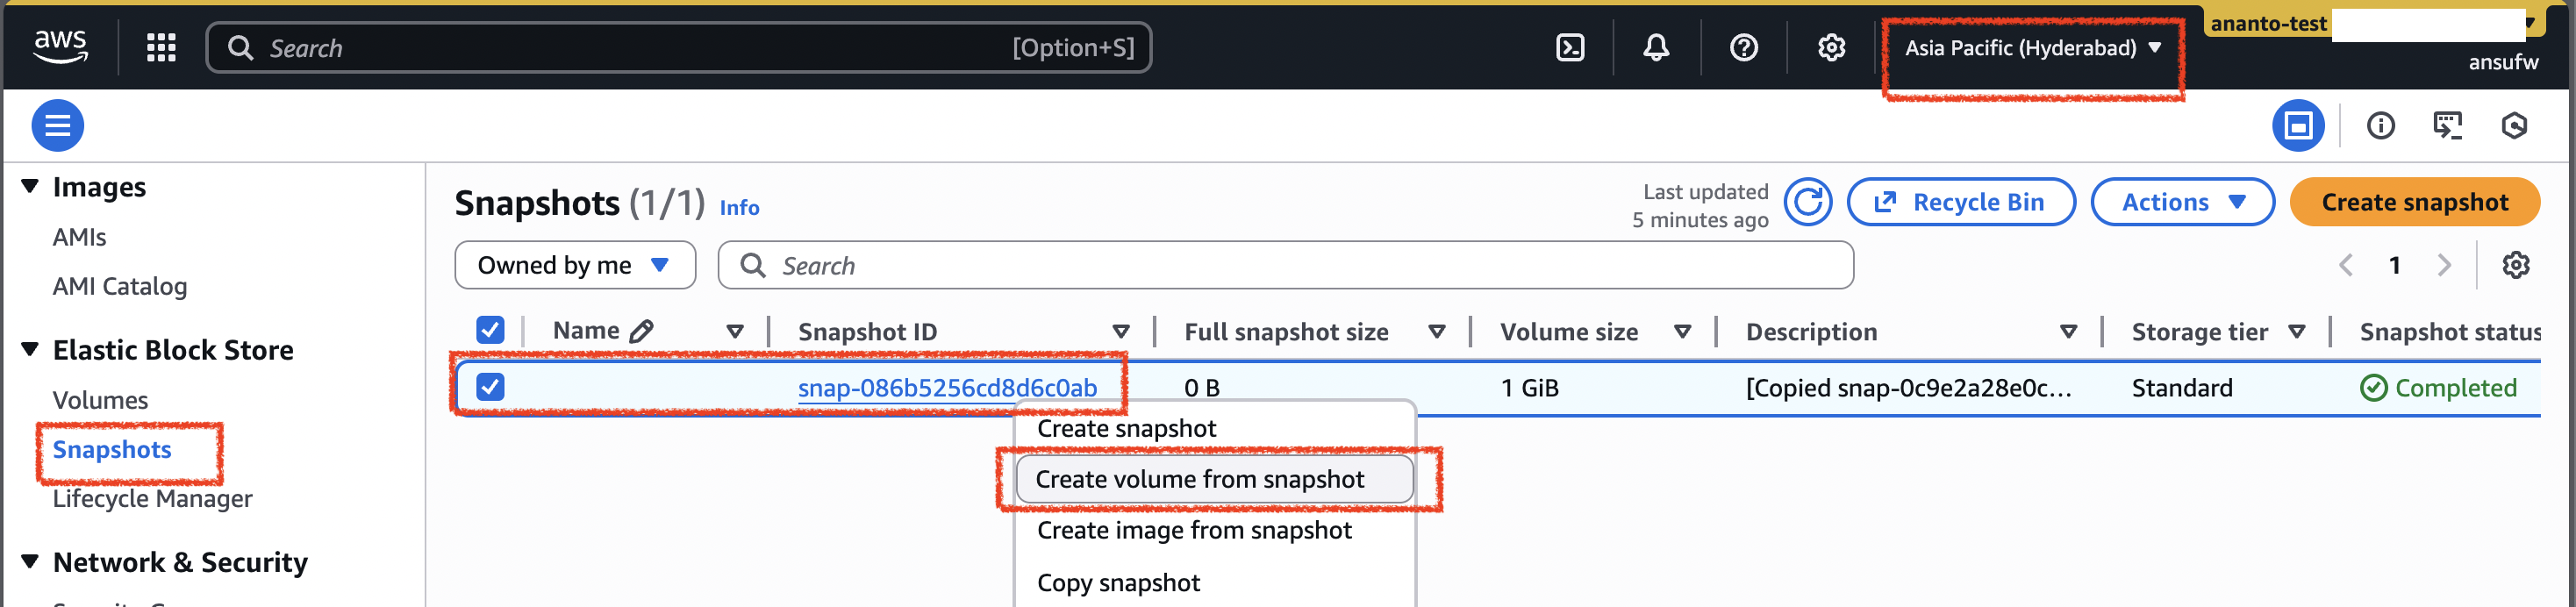
- since I copied the snapshot to ap-south-2, so the snapshot can be seen in that region
Snapshot to Volume
- to make volume from the copied snapshot, click right on the snapshot and choose “Create volume from the snapshot”
- then under the “Volume settings” you can configure some parameter and set the Availability Zone within the region (e.g. ap-south-2a, b, and c)
Recycle Bin
- from the “Snapshots” menu, click “Recycle Bin” on top bar (between refresh and Actions button)
- On the Recycle Bin page, click “Create retention rule” button
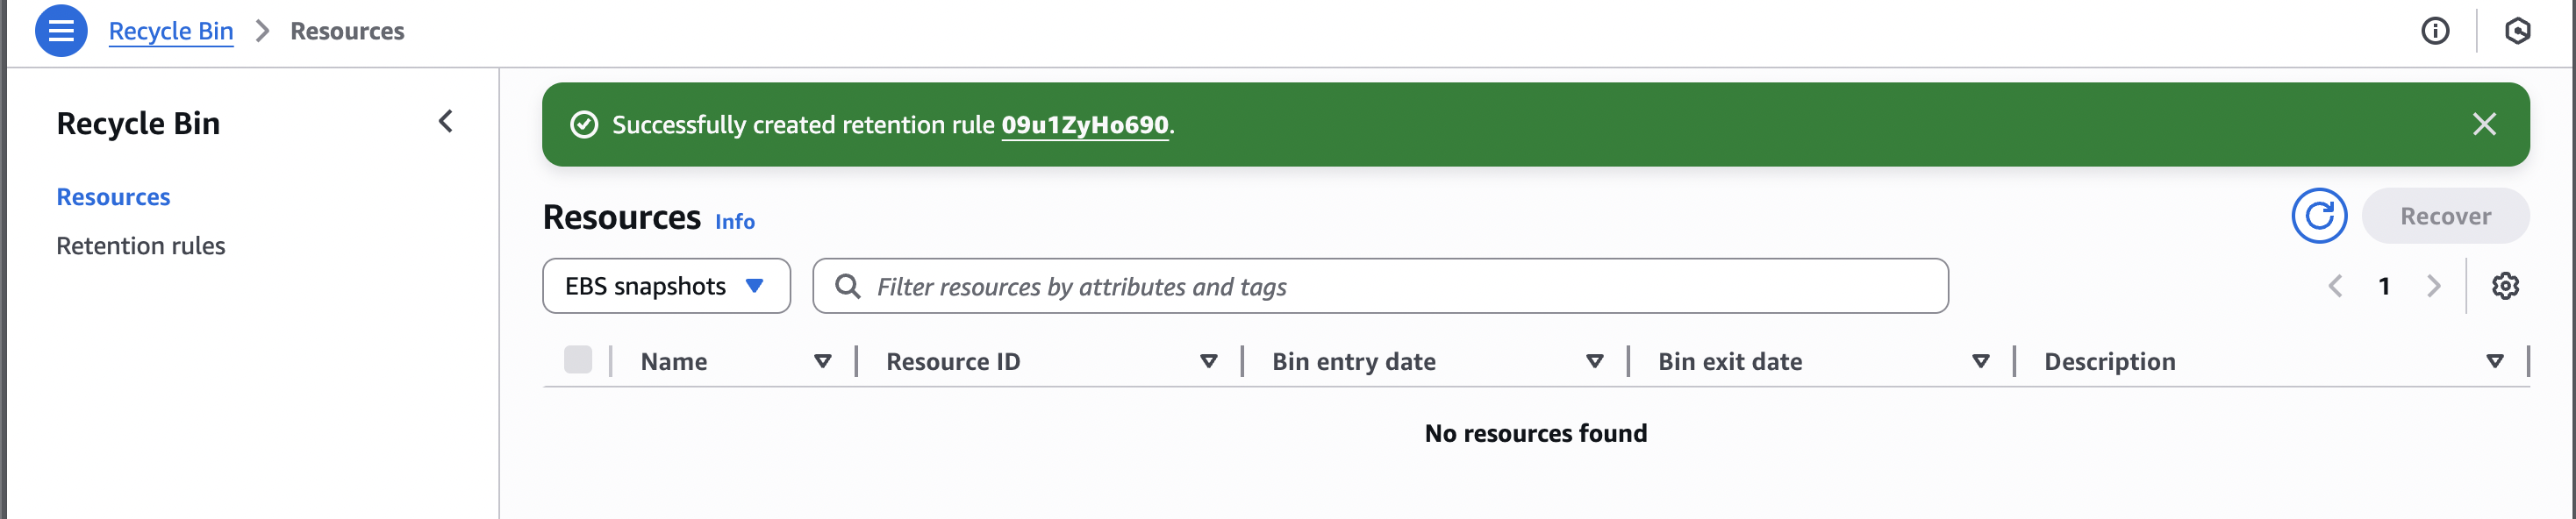
- Then below the “Create retention rule” form, set some parameters, then click “Create retention rule” button on the bottom right conner.
- Then check on the “Retention rules”, you should have one now.
- And then check on the “Resources”, you have no resources
- Then delete the snapshot
- refresh again the “Resources” page, now you must see the deleted snapshot there
- you can play around with “recover” button to bring snapshot back
